RPG D&D Supplement Review: Tactical Maps Adventure Atlas
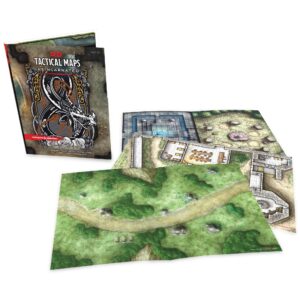 When the Tactical Maps: Reincarnated first debuted, many of my friends began looking through the maps they’ve aquired over the years to see if it was a product they really “needed”, given that they’re all reprints from 4e and earlier. It’s a fantastic selection, useful for a lot of situations, but many of us have a lot of those maps. With the release of Tactical Maps Adventure Atlas, you may find yourself picking up the Reincarnated maps, so you have everything close at hand for any game night where you need to throw something together quickly.
Lead designer James Introcaso, along with M.T. Black, Will Doyle, James Haeck, Rich Lescouflair, Ginny Loveday, Shawn Merwin, Cindy Moore, and Ashley Warren have taken the 22 maps from Tactical Maps: Reincarnated and have created multiple short adventures for every one. There are 88 adventures here, for levels 1-20, so you’ll never have to worry about coming up with an adventure on the fly again, if you so choose.
The index at the beginning of the book breaks down the adventures and their locations by level, telling you which maps to use for which encounters. This is incredibly useful, because once you get into the meat of the book, the game is organized based on the map.
Each map is labelled A through V, and after a brief description of the map, including providing overall mechanics to keep in mind, the chapter breaks down the locations within. In the case of a map like Tallow Town (Map V), it describes each building in detail, including the people inside, and any treasure you might find.
The next part of each chapter is the actual encounters for each map. Each encounter is for a different level, so if you were to decide to run a series of these, you wouldn’t encounter the same map back-to-back. Each small adventure has a story hook, explains what creatures will be encountered, and any events that may take place during the adventure. Monsters to be found in the Monster Manual are not statted within the book, but the back of the book has a very extensive bestiary. If the monster doesn’t tell you where to look for the monster in the appendix, it can be found in the MM. Pretty straight forward.
I’m not going to go through all 88 mini-adventures, so I’ll go through a few of the maps I particularly like, and the adventures set there.
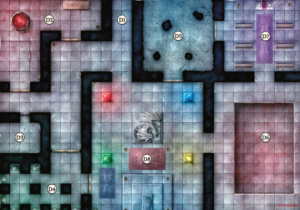 The Dragon Knight’s Temple (D) is a really interesting map with multiple distinctive rooms, all surrounding a large room with a dragon statue and four columns with glowing, colored gemstones. There’s a whole puzzle involved in it that I won’t spoil, but it’s pretty nifty. There’s also a half-dragon death knight, which I like, because the last time I had players go up against a death knight PEOPLE DIED. The adventures here are for 17th-20th level. In one adventure, the players are slowly driven mad, trying to undo the magic of the cursed temple. In the second, the players must face off against the death knight, but are rewarded mightily for their efforts. In the final, they must battle an ancient silver shadow dragon that will prove a challenge for even the highest level heroes.
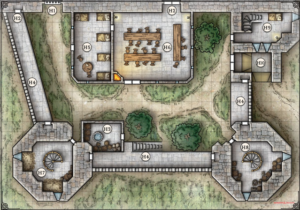 Fort First Watch (H) features the outer courtyard of a castle patrolled by ten soldiers. The emplacements built to defend the castle can be used tactically against anyone attacking the castle. The four adventures are for 2nd, 4th, 6th and 9th levels. The 2nd level mission involves a gnoll attack on the fort. There’s some cool besieging rules that should be very exciting for a 2nd level party. The 4th level adventure has the fortress attacked by orcs, but they have a hidden weapon within the fortress which should sew chaos, allowing them easier access to the fort. The 6th level adventure has a hobgoblin attack already underway, with the goblinoids having already taken part of the castle with a literal army of hobgoblins at their back. And finally, the 9th level adventure has not only giants, but multiple dragons attacking as well! It’s a great set piece to use for really important moments of the campaign.
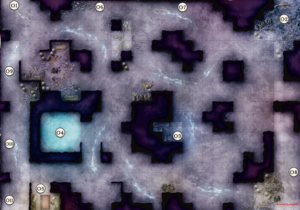 The third map we’ll look at is Crystal Cavern (O). The interior of a large crystaline mountain, the cavern has slick floors and unstable stalagtites. It feels very dynamic, with a definite 4e “everything is tactical” feel to it. Giant wolf spiders, skeletons and oozes can be found within. The first adventure, for 5th level has the players venturing into the caverns to fetch gems for a wizard’s staff. The crystal, however, has potent magical effects. The 8th level adventure features drow summoning an ancient high priestess who has been locked away for centuries. If successfully summoned, it can turn a hard encounter into a near insurmountable one, so the players will need to be careful. The 9th level adventure involves Deurgar who have returned to the cavern to begin mining it again. Upon encountering the players, they Enlarge themselves and begin causing earthquakes within the cavern, causing stalagtites to rain down everywhere. Then the 10th level adventure involves a puzzle, with the twist that completing the puzzle will free the drow priestess, who can now either reward the party, or fight them, depending on their attitudes toward her.
Keep in mind, these are three of twenty two different maps. This book is really fantastic and comprehensive. Concievably, the DM could show up for a session armed only with a set of dice, the Tactical Maps: Reincarnated, a Monster Manual (or the D&D monster cards) and this book (which James Introcaso tells me will be available in print at some point), and you’ve got a whole night of gaming in front of you. This is great for pickup games, or if you see a map and adventure you particularly like, something to fit into your adventures with a little bit of planning. You can pick up a copy of Tactical Maps Adventure Atlas here (affiliate link).
A copy of Tactical Maps Adventure Atlas was sent to Dice Monkey for review.
