The Legend of Zelda: Link’s Awakening for 4e D&D
I’ve decided to build Link’s Awakening, my first Zelda game into a 4th Edition adventure! Follow me!
The magical items in Link’s Awakening are fairly standard fare if you’ve played a lot of Zelda games. There’s the Roc’s Feather, the Pegasus Boots, the Hookshot.
Even so, these particular items come in handy when in the dungeons of Koholint Island. They solve various puzzles and help Link (or your heroes) get past previously insurmountable odds. (EDITOR’S NOTE: I used to have the 4e stats for many of the items here, but the jpg files have been lost. Sorry!)
Now we’re going to talk about how to run an adventure on Koholint Island. Remember, I’ve chosen this particular Zelda adventure for multiple reasons: One, because it’s the only one I’ve completed all the way through; Two, because it can fit into any campaign, being on an island and all; And three, because a lot of people haven’t ever played this adventure, so you’re less likely to have anyone realize you’re lifting the adventure from a Legend of Zelda game.
So, where to begin?
The adventure would begin with the players sailing to some particular location. Where, doesn’t matter, so long as they’re sailing. It could even be on an airship, as long as they’re over the water.
A large storm comes up, destroying the ship and knocking them unconscious. You could even run the storm as a skill challenge:
EYE OF THE STORM
Skill Challenge
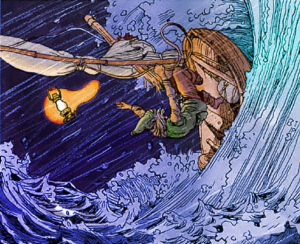 While sailing on the open water, a massive storm sweeps in. Can you save the ship?
Complexity 4 (10 Successes before 3 Failures)
Nature (DC Moderate/Hard): You are able to tell of the approaching squall, and are able to prepare the ship for the approaching storm. During the storm, you are able to help navigate the ship on the waves.
If a player uses this skill before any others, it counts as two successes, and is a Moderate DC. Further tests are Hard.
Athletics (DC Moderate): Handling the rigging, you are able to keep the masts from being torn to shreds.
If you fail this check, you lose two healing surges. If you fail this twice, the power of the storm and the pulling of the ropes throws you into the mast, breaking your arm. Gain the Broken condition.
Broken (Condition)
Until your wound is fully healed, you can only use one arm. Take a -4 penalty to all Strength and Dexterity checks which would require two hands. In addition, you may not use any items in this hand. You may remove this condition by expending 25 Healing Surges (this will be broken up over multiple days).
Design Note: This is designed so that if the player wishes, they can sit out a few days to heal. Or, they may spend a few healing surges at a time to remove the condition over a longer period of time.
Acrobatics (DC Moderate): Climbing the rigging, you attempt to fix the sails from above.
Failing this check will force you to expend two Healing Surges.
Endurance (DC Moderate): Standing firm against the storm, you hold your ground.
This check will not give you a success, but will instead gain a +2 to all further checks. Failing this check will not give you a failure.
Arcana (DC Hard): Twisting the arcane fabric, you attempt to calm the storm.
If the heroes succeed at the Skill Challenge, the ship smashes on the reef of Koholint. They are stranded, but the ship is in one piece, and they are conscious. If they fail, the ship is struck by lightning, the ship is destroyed, and they are all knocked unconscious.
 If they are still conscious, they’ll want to settle on the beach that night and wait for dawn. At dawn, a girl of about 16 named Marin will be walking along the beach and find them. Quite surprised, she’ll speak to them telling them of the island. See below for the types of things she’ll explain. When the heroes are done speaking to her, they’ll encounter the owl. See below for the owl.
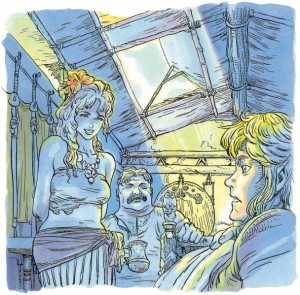
If the heroes are unconscious, they’ll be found by Marin on the beach, who, with her father Tarin will take the heroes to Mabe Village, a little inland, to get patched up. When they awake, they find themselves in Marin and Tarin’s inn, where they are told of the island. They’ll also all have -2 Healing Surges for having been unconscious, as a result of failing the skill challenge.
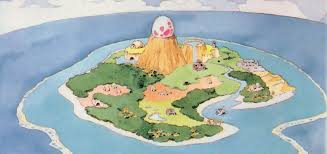
Koholint Island is a moderately sized island, with two distinct villages. Mabe Village, where the humans and elves live, and Animal Village, where creatures who can speak the Common Tongue are kept. The island is dominated by Mt. Tamaranch, at the top of which is an enormous egg. According to the Legend of the Wind Fish, the island’s guardian resides within the egg in eternal slumber. They also inform them that since their arrival on the island, monsters have begun appearing everywhere: Goblins, Kobolds… and worse.
The heroes are without any of their possessions, and have to head back to the beach to find their things. This is where the owl appears, and the storyline merges from whether they were unconscious or not.
Swooping down through the beach’s palm trees, an owl perches on a low branch. “Greetings, travelers,” the owl hoots. “So you’re the reason the monsters have been acting up as of late…” His feathers ruffle. “I’m afraid it will be quite impossible to leave this island as long as the Wind Fish remains in slumber. If you desire to leave the island, you will find the information you need in the Mysterious Forest north of Mabe Village. Good luck…” With that, the owl flies off.
The heroes will have to venture into the woods. Within, they find it swarming with goblins. They’ll also find some strange mushrooms. If they pick them and save them, they’ll be able to give them to the bog witch later to make into Magic Powder. You don’t want more than two encounters with goblins, or it will get tedious. Eventually, they’ll find a chest in a goblin camp which contains a strange key the size of an arm. When they take it back to Mabe Village, Tarin is surprised to see it.
“That’s the key to Tail Cave,” he says. “It’s believed to be an old crypt built centuries ago. It’s been locked since before I was born, and no one’s been inside. The symbols on the key match those of the entrance to the crypt…”
With that, the heroes will be off to Tail Cave. We’ll look at that dungeon next.
The challenge, when sculpting the dungeons in The Legend of Zelda: Link’s Awakening is that there are a lot of rooms in each dungeon. More rooms than players or DMs want to slog through to complete just one of eight dungeons on the island.
So instead of having 23 separate encounters (that’s how many rooms there are in Tail Cave), I think it can be broken down into five encounters, which will encompass the feel of the dungeon without forcing the players to sit through hours upon hours of this cave. Also, many of the monsters I’ll be mentioning here aren’t exactly seen in the game, but have many of the same properties, and try to help with the general feel, as well as keeping true to D&D.
Another issue: I don’t think it’s realistic to have there be exactly the number of copies of magical items for every player. By that I mean, for a party of five, I don’t want there to be five Roc’s Feathers or five Pegasus Boots, but I think, for the sake of fairness, I’ll have to. The puzzles should really utilize the items, so the players should have the items to use.
Also: The mini-boss in Tail Cave looks really ridiculous, so we’re going to need to change him up.
Finally: I won’t be writing up the monster stat-blocks. If anyone else wants to, that’s great. I may revisit these monsters and write something up for them.
On to the adventure.
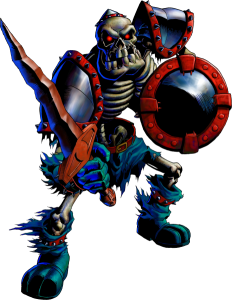 The heroes arrive outside of Tail Cave, which sports a number of strange statues: serpentine creatures with large pincers on their faces. The cave has a large gate over its entrance, with a large keyhole. Inserting the key allows the players to open the gate. Once inside, they find it largely unlit. They have to use their torches to navigate. As they begin to move through the room, they’re going to encounter Skeletons who have been raised from their eternal sleep by the Nightmare who has taken up residence.
Near the entrance, they first encounter the undead inside.
Encounter 1: Unsteady Ground
In this encounter, the players encounter a group of skeletons in a room filled with deep, 20 foot holes. The holes pock-mark the ground at random places, making movement quite difficult. The skeletons are quite nimble, and the heroes find themselves challenged by the monsters’ agility.
The skeletons would have abilities basically allowing them to ignore the holes, or at least make fantastic saving throws against falling in. The heroes wouldn’t be so lucky, so the risk is to them.
Upon the monsters’ defeat, they find a chest containing a map of the dungeon. It points to one particular location, with the words “Roc’s Feather”.
Encounter 2: Roc’s Feather
![]() After more searching, the PCs find themselves in a room with a large platform. All around it are deep holes, except where the steps are. When the players arrive at the top of the steps, skeletons rise from the ground, carrying large shields. They will push the heroes, trying to knock them into the holes to keep them from getting to the chest in the center of the platform.
After more searching, the PCs find themselves in a room with a large platform. All around it are deep holes, except where the steps are. When the players arrive at the top of the steps, skeletons rise from the ground, carrying large shields. They will push the heroes, trying to knock them into the holes to keep them from getting to the chest in the center of the platform.
Once the skeletons have been dispatched, the heroes open the chest to discover a set of feathers inside, each the size of a short sword. When holding it, the hero feels much lighter, and can jump higher, farther, and is more easily able to avoid falling into the many pits that fill this dungeon.
Encounter 3: Rolling Bones
The heroes step into this chamber, and see a large spiked steel cylinder, which stretches the length of the room. A large and sinister skeleton, this one looking to be the size of a goliath, pushes the cylinder towards the heroes. It rolls across the room, dealing massive damage to anyone under it. The bonus given by the Roc’s Feather should help the players get over it to kill the skeleton.
Encounter 4: Deepening Nightmare
As they venture further into the cave, they begin to encounter shadowy creatures. Bats made of darkness, sentient disks of dark metal spiraling through the air. This encounter would involve a lot of movement, as the disks never stop moving, swooping around for further attacks. The bats would be minions and would exist to harry the heroes.
At the far end of the chamber lies a portal of darkness.
When the heroes defeat the bladed creatures, they move through the portal.
Encounter 5: Moldorm, Master of Tail Cave
Inside, they find the same creature as the statues outside: serpentine, with a large pincer for a mouth. It moves quickly about the room, attacking the heroes by slamming into them with its weight, or biting with its mouth.
It seems to be made of pure darkness, and a constant buzzing, like that of a thousand bees, emanates from it. “OUTZZZIDERS!” It howls. On the edge of the room are deep pits, 30 feet deep, which the Moldorm attempts to push the heroes into. If the heroes pay attention, they will notice the creature tries to protect the tip of his tail. The heroes can strike it, cutting off a segment of its tail. Doing so provokes its fury, but if they can keep at it, they are able to hack it off all the way to its head. The Roc’s Feather should help them make the acrobatics checks needed to get past its head to attack the tail. Once it’s killed, it bursts into shards of shadow, and seeps into the ground.
In the next room, they discover a small chamber with a soft glowing light. On a platform, they see a cello, with a full moon depicted on its body. The bow moves on its own, playing a soft tune. When the heroes take it up, it begins to play louder, a slow, mournful song.
“Swamp… A path opens… in the blooms…” a deep, but soft voice slowly whispers.
Finding their way out of the cave, they stop as the owl appears again.
“I see you’ve found one of the Instruments of the Sirens,” he says. “You’ll need to gather all eight of those in order to awaken the Wind Fish. Learning the song that will awaken him… That will be a true test… Farewell.” With that, the owl flies off.
When the heroes take the cello to Marin and Tarin, they explain about the legend of the Eight Instruments of the Sirens. According to the legend, the Wind Fish had created the instruments to be an extension of his power, keeping the island safe. But then the Wind Fish fell into slumber, and the instruments were lost.
They tell the heroes that they can keep the instruments in the inn for safekeeping as they find them. When the heroes ask about “the swamp”, they are told that to the north there exists Gopongo Swamp and Bottle Grotto, an old dank cavern that’s been blocked by thick vines for as long as anyone can remember.
When the heroes head that way, they find, in the swamplands, an bog witch. If they have the mushrooms, she’ll make them some Magic Powder. If not, she’ll tell them to bring her mushrooms from the Mysterious Forest to make the powder.
Deeper into the fens, they’ll find a cave, Bottle Grotto, covered in thick vines. They’re impervious to fire and weapons. However, the magic powder, when sprinkled on the vines, will cause them to burn and wither away, allowing entrance to Bottle Grotto…
Now we’ll explore the depths of Bottle Grotto.
The heroes have arrived in Bottle Grotto, an old cave wet with swamp water. The smell is overpowering. This was, long ago, a cave where the best clay could be found for making bottles for the villagers. However, it’s long since been abandoned, choked with vines and filled with smashed pottery.
The Grotto has since been filled with Mask-Mimics, cloaked and masked creatures who can perfectly mimic the actions of those they see.
Encounter 1: Bottle Room
In this room, the Mask Mimics ambush the heroes in a large, dark room. The wind blows strongly here, so all torches are instantly extinguished. There are large braziers here, though they are unlit. Heroes who think quickly can put Magic Powder on the braziers which will light them with an unearthly green fire. The Mask Mimics are able to perform immediate reactions of powers the heroes have just used on them, and their masks transform to mimic the face of those they are fighting, though the face appears as stark white as the mask originally did.
Encounter 2: Power Bracelet
In this chamber, a large chest sits at the far end of the room. The room is filled with stone columns which appear unsteady, as well as many large bottles, larger than a person. They are too heavy to lift. As soon as the heroes have crossed the room, but before they open the chest, they are ambushed by Mask Mimics who appear in a black smoke (they are creatures of the Shadowfell). If they get the chest open, they’ll find Power Bracelets waiting for them. Once they have the bracelets, they’ll be able to lift the bottles to throw at the Mimics, though the Mimics are too weak to lift the bottles themselves. Heroes can also push over columns on the Mimics, which, since the column is collapsed, cannot perform an identical action.
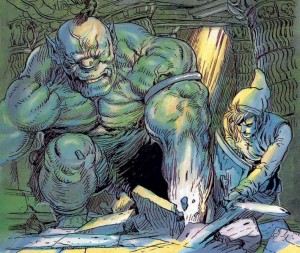 Encounter 3: Hinox the Cyclops
Hinox is a massive cyclops who has been living down in the caverns, eating whatever he can find. His main attack is to pick a hero up and throw them across the room into a pillar. If enough pillars fall down, the ceiling will collapse down on Hinox’s head. His death reveals another passageway.
Encounter 4: Deeper Shadows
This encounter, like the one in Tail Cave, illustrates the shaping of nightmares. Great bats, Mask Mimics who now have faces constantly changing, swooping around the room. More bottles litter this room.
Encounter 5: The Nightmare Djinn
This room is largely empty. A massive black bottle sits in the center of the room. A dark shadow slowly emerges from it. When the heroes try to attack the Djinn, they find their attacks have no effect on it. It’s not until they destroy the bottle that houses the Djinn that they can harm him. The only way to break the bottle is by picking it up and smashing it.
Once the Djinn is slain, he disapates into a cloud of smoke. Remaining behind is a conch shell. Taking it, the heroes can depart the Grotto. Outside, the owl once again appears.
“Hoot… It appears you’ve found the Conch Horn, another one of the Instruments of the Sirens. To the east lies the Ukuku Prarie… Go there, and you’ll find the next of the instruments.” The owl flies off.

