The Legend of Zelda: Link’s Awakening 5e Pt. 2 (Tail Cave)
The challenge, when sculpting the dungeons in The Legend of Zelda: Link’s Awakening is that there are a lot of rooms in each dungeon. While in 4e, I knew it was simply impossible to have players slog through the whole of a dungeon EIGHT TIMES (the number of dungeons in Link’s Awakening), you could definitely do it for 5e without a problem. I simply don’t have the time to do so.
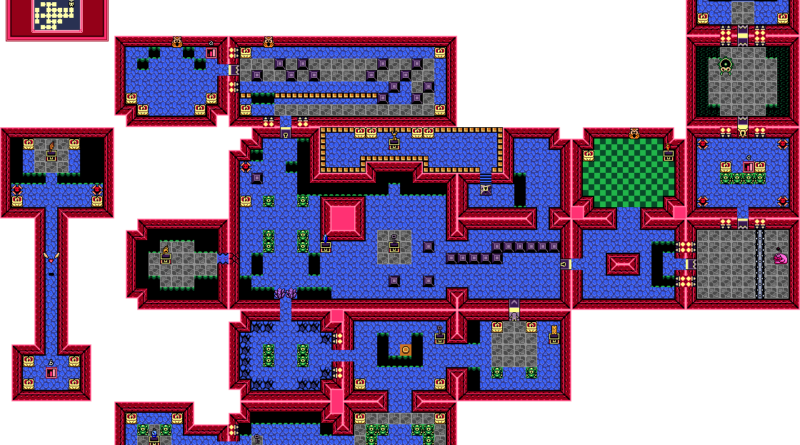
So instead of having 23 separate encounters (that’s how many rooms there are in Tail Cave), I think it can be broken down into five main encounters, which will encompass the feel of the dungeon. Also, many of the monsters I’ll be mentioning here aren’t exactly seen in the game, but have many of the same properties, and try to help with the general feel, as well as keeping true to D&D. I’m also not statting up the monsters, but instead giving you an idea of what to shoot for. As an experienced 5e DM, I can do this on the fly, but if you can’t, I advise you to poke through the MM or Volo’s Guide and find something thats stats closest approximate what you’re looking for.
For the Roc’s Feather, I recommend using the Boots of Striding and Springing, reflavored as a single feather you can slip into the top cuff of your boot.
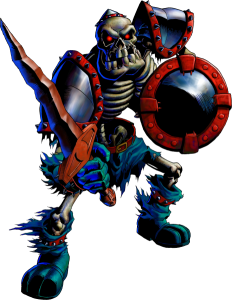
Also: The mini-boss in Tail Cave looks really ridiculous, so we’re going to need to change him up.
One final note: I’ll be describing the dungeon here much more cave-like than it was depicted in the video game, since it is called TAIL CAVE.
On to the adventure.
 The heroes arrive outside of Tail Cave, which sports a number of strange statues: serpentine creatures with large pincers on their faces. The cave has a large gate over its entrance, with a large keyhole. This place was once a crypt for the southern end of the island, but has long since been sealed up. Inserting the key allows the players to open the gate. Once inside, they find it largely unlit. They have to use their torches to navigate. As they begin to move through the cave system, they’re going to encounter Skeletons who have been raised from their eternal sleep by the Nightmare who has taken up residence.
Near the entrance, they first encounter the undead inside.
Encounter 1: Unsteady Ground
In this encounter, the players encounter a group of skeletons in a room filled with deep, 20 foot holes. The holes pock-mark the ground at random places, making movement quite difficult. The skeletons are quite nimble, and the heroes find themselves challenged by the monsters’ agility. Whatever dark magic has raised them has given them unnaturally heightened reflexes. Consider upping their Dex by a few and raising their AC by a bit as well as they leap and dodge out of the way.
The skeletons would have abilities basically allowing them to ignore the holes, or at least make fantastic saving throws against falling in. The heroes wouldn’t be so lucky, so the risk is to them.
Upon the monsters’ defeat, they find a chest which has toppled and fallen into one of the holes. It containins a map of the crypts. It points to one particular location, with the words “Roc’s Feather”.
Encounter 2: Roc’s Feather
![]() After more searching, the PCs find themselves in a room with a large platform. All around it are deep holes, except where the steps are. When the players arrive at the top of the steps, skeletons rise from the ground, carrying large shields. They will push the heroes, trying to knock them into the holes to keep them from getting to the chest in the center of the platform.
After more searching, the PCs find themselves in a room with a large platform. All around it are deep holes, except where the steps are. When the players arrive at the top of the steps, skeletons rise from the ground, carrying large shields. They will push the heroes, trying to knock them into the holes to keep them from getting to the chest in the center of the platform.
Once the skeletons have been dispatched, the heroes open the chest to discover a feather inside. When holding it, the hero feels much lighter, and when placed in their boot can jump higher, farther, and is more easily able to avoid falling into the many pits that fill this dungeon. Here you’ll use the Boots of Striding and Leaping.
Encounter 3: Rolling Bones
The heroes step into this chamber, and see a large spiked steel cylinder, which stretches the length of the room. A large and sinister skeleton, this one looking to be the size of a goliath, pushes the cylinder towards the heroes. It rolls across the room, dealing massive damage to anyone under it. Players will need to take saving throws to keep from getting knocked prone or even restrained as they’re stuck underneath. The bonus given by the Roc’s Feather should help the players get over it to kill the skeleton. Other skeletons can rise up as needed.
Encounter 4: Deepening Nightmare
As they venture further into the cave, they begin to encounter shadowy creatures. Bats made of darkness, sentient disks of dark metal spiraling through the air. This encounter would involve a lot of movement, as the disks never stop moving, swooping around for further attacks. The bats should have only 1-2 HP and would exist to harry the heroes.
At the far end of the chamber lies a portal of darkness.
When the heroes defeat the bladed creatures, they move through the portal.
Encounter 5: Moldorm, Master of Tail Cave
Inside, they find the same creature as the statues outside: serpentine, with a large pincer for a mouth. It moves quickly about the room, attacking the heroes by slamming into them with its weight, or biting with its mouth. Think of it as Remorhaz made of darkness.
Moldorm, Master of Tail Cave
- Armor Class 14 (Natural Armor)
- Hit Points 80
- Speed 30 ft., climb 30 ft.
INT 12 (+1)
WIS 7 (-2)
CHA 3 (-4)
- Senses Blindsight 30 Ft., passive Perception 8
- Challenge 2 (50 XP)
- Bite. Melee Weapon Attack: +4 to hit, reach 5 ft., one creature. Hit: 7 (1d8 + 2) piercing damage plus (2d6) poison damage. The target must succeed on a DC 13 Constitution Saving Throw. If the poison damage reduces the target to 0 hit points, the target is stable but poisoned for 1 hour, even after regaining hit points, and is paralyzed while poisoned in this way.
It seems to be made of pure darkness, and a constant buzzing, like that of a thousand bees, emanates from it. “OUTZZZIDERS!” It howls. On the edge of the room are deep pits, 30 feet deep, which the Moldorm attempts to push the heroes into. If the heroes pay attention, they will notice the creature tries to protect the tip of his tail. The heroes can strike it, cutting off a segment of its tail. Doing so provokes its fury, but if they can keep at it, they are able to hack it off all the way to its head. Each time they successfully attack a segment, the attack deals double damage, but the attack made to the tail is at disadvantage. Once it’s killed, it bursts into shards of shadow, and seeps into the ground.
In the next room, they discover a small chamber with a soft glowing light. On a platform, they see a cello, with a full moon depicted on its body. The bow moves on its own, playing a soft tune. When the heroes take it up, it begins to play louder, a slow, mournful song.
“Swamp… A path opens… in the blooms…” a deep, but soft voice slowly whispers.
Finding their way out of the cave, they stop as the owl appears again.
“I see you’ve found one of the Instruments of the Sirens,” he says. “You’ll need to gather all eight of those in order to awaken the Wind Fish. Learning the song that will awaken him… That will be a true test… Farewell.” With that, the owl flies off.
When the heroes take the cello to Marin and Tarin, they explain about the legend of the Eight Instruments of the Sirens. According to the legend, the Wind Fish had created the instruments to be an extension of his power, keeping the island safe. But then the Wind Fish fell into slumber, and the instruments were lost.
They tell the heroes that they can keep the instruments in the inn for safekeeping as they find them. When the heroes ask about “the swamp”, they are told that to the north there exists Gopongo Swamp and Bottle Grotto, an old dank cavern that’s been blocked by thick vines for as long as anyone can remember.

